Do you want to learn how to propagate Monstera? You are on the right page. We will give you stem cutting propagation in water pr soil, which is the best way. But you can grow Monstera from seeds, use air-layering or division.
Please note that you cannot propagate Monstera without a node. Also, you cannot use aerial roots, leaves, or a stem without a node. But you can propagate this plant with a stem node without leaf or aerial root.
We will look at each Monstera propagation way and give you steps to follow. You will also learn to care tips for newly transplanted rooted cutting towards the end.
Last but not least, it doesn’t matter if you are propagating a Monstera adansonii, Monstera deliciosa (split-leaf philodendron or the Swiss cheese plant), or any of the about 45 species. What we will learn applies to all the species.
Contents
- Monstera propagation by stem cutting
- 1. Is propagating Monstera without node possible?
- 1. Tips for success
- 2. Propagating Monstera in water
- 3. How to propagate Monstera in soil
- 4. Propagating Monstera without leaf (node)
- Growing Monstera from seeds
- 1. Where to buy the Monstera seeds
- 2. Warning on Monstera seeds
- How to grow Monstera from seeds
- Air layering Monstera propagation
- How to propagated Monstera by division
- Transplanting Monstera
- Transplant shock
- Rooted Monstera care tips
- Warning
Monstera propagation by stem cutting
We will use stem cutting in water and soil to propagate Monstera, including a leafless stem node. But before that, we will begin by answering a fundamental question: can you propagate Monstera without a node?
Then we will teach you how to select a suitable stem before going to propagation stems.
1. Is propagating Monstera without node possible?
You cannot propagate Monstera plants without a node (stemless nodes, leaves, or aerial roots). A node is a bumpy or knobby area on the stem, and the internode is the space between nodes.
It is at the node where leaves, axial buds, flowers, or aerial roots grow. And may have a leaf and leaf scar or not, or aerial roots. Also, it will appear green or brownish ring. You cannot fail to see it.
Yes, you can propagate some plants such as begonia rex, cactus with pads or bubby ears, jade plant (crassula), Kalanchoe, peperomia, or Sansevieria with a leaf cutting. Not Monsteras.
1. Tips for success
Do you want your propagation to turn out very successful? Here are tips for selecting and taking and stem cutting.
a. Selecting a stem cutting
Select a mature, healthy stem with at least a node, i.e., it shouldn’t be diseased or have pests.
We prefer taking one with at least two nodes and about 6 to 8 inches long to ensure success. One with an aerial root will root faster. But not a must.
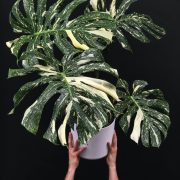
If you are propagating a variegated Monstera, the node you select should have a leaf with variegations.
b. Cutting the stem
Use a sharp, sterilized pruning shear and cut it just below the node you will use to propagate it. Cut about ¼ or ½ inches below from the node. You don’t need a longer stem as it will slow water absorption and will eventually rot
Your stem cutting is now ready for propagation either in water or soil. Let us look at each of these two options.
c). Have a rooting hormone
While not mandatory, it is important to have a rooting hormone. Why? Because it will spur faster rooting (promotes rapid cell root formation) and prevents root rot, especially those with fungicide. Also, some brands like HydroDynamics Clonex Rooting Gel has nutrients.
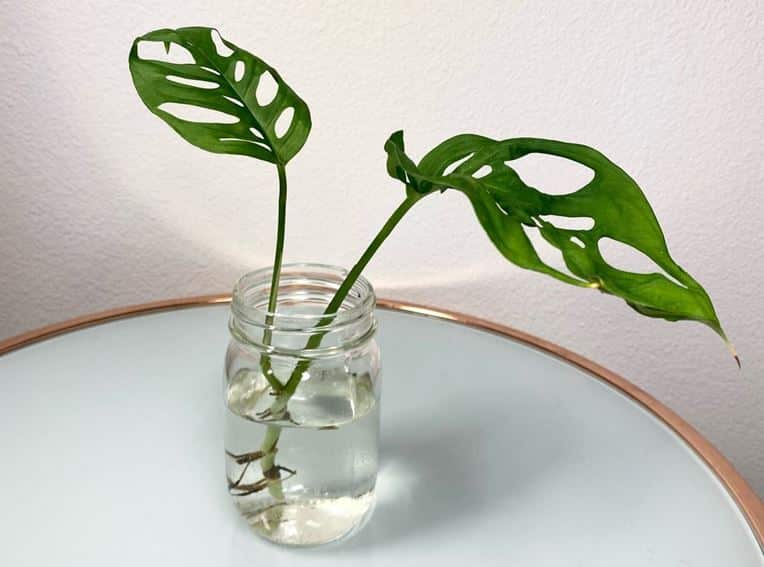
2. Propagating Monstera in water
Many people love Monstera water propagation because less messy. Also, you can monitor roots grow, including rot cases, and use the cutting as a centerpiece on tables.
On the downside, your plant won’t get many nutrients, it may take a little longer, and it suffers more shock when transplanted after rooting.
Steps to follow
- Step 01: Select a healthy stem with at least a node and cut it below the node. If it has more than two leaves, remove the lower ones leaving one or two.
- Step 02: Apply your rooting hormone on about 2 inches of the cut part. .
- Step 03: Dip your cutting in a jar with water. Ensure the water covers the node. But don’t immerse the leaves.
- Step 04: Take the Monstera cutting you are propagating to a warm place, ideally 70 to 77° F or 21 to 25°C, with bright indirect light.
- Step 05: Replace your water every 3 to 4 days and fill it when it goes down.
What to expect
Your Monstera will have grown new growth, rooted and ready to transplant by the end of the 4th to 6th week. How quickly this occurs depends on the prevailing conditions.
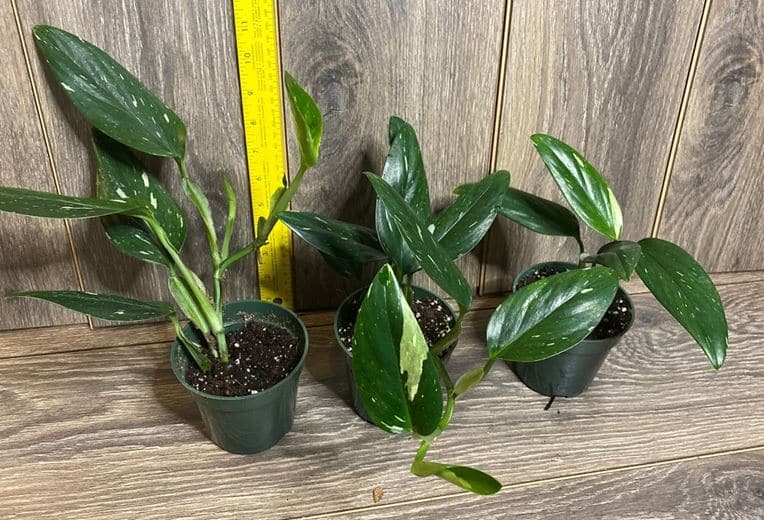
3. How to propagate Monstera in soil
We love soil propagation because it takes shorter. When you transplant it, your plant won’t suffer much shock and will get more nutrients. But you cannot see roots grow, and it is a little messy.
What you need
- Nursery pot
- Sealable transparent plastic bag
- Potting mix for soil propagation. You are free to use any well-drained potting mix. It can be peat moss and perlite, aroid mix, or even sphagnum moss alone.
Steps to follow:
- Step 01: Place your potting mix in your nursery pot and thoroughly water it until excess water flows from drainage holes. Discard any that collects on the saucer. If using sphagnum moss, first soak it for an hour and wring it.
- Step 02: Use your sterilized scissor to take your cutting. It should be healthy, mature, and with at least a node. Then remove the lower leaves leaving only the upper 1 or 2 leaves
- Step 03: Apply your rooting hormone on the cut end. Not mandatory.
- Step 04: Poke a hole on the potting mix with your finger and plant your cutting, about 2 inches deep, covering the lower node. Then lightly press the soil onto the cutting to help it remain upright.
- Step 05: Cover your stem cutting with your plastic bag, ensuring it doesn’t touch leaves. Use a stick or anything to prevent it. Also, leave a small breathing opening. The plastic bag will help lock in humidity.
- Step 06: Place your cutting in a warm area with bright, indirect light. The ideal temperature should be 70 to 77° F (21-25°C) if you want quicker rooting. But a 65° to 85° F range is ok.
- Step 07: Open the plastic bag every few days to let your plant breathe. Also, mist the soil if it begins to dry.
What to expect
You will see new growth at the end of the 3rd to 5th week, and your plant will have roots long enough for transplanting. To check if rooting has happened, do a slight tag pull. If it doesn’t easily come out, there are roots.
4. Propagating Monstera without leaf (node)
Some vendors sell Monstera stem nodes without leaves. It is possible to propagate them but not in water.
Warning! Don’t buy it if you want a variegated plant as you may not know if it will give variegations. The stem node should have at least a variegated leaf.
Here is what to do in the case of a leaf-less node.
What you need
- Sphagnum moss
- Transparent plastic bag
- Shallow tray or container
Monstera stem node propagation
- Soak sphagnum moss in water for about an hour and then thoroughly squeeze it to remove excess water. Then place it in the growing container.
- Lay your Monstera nodes on the sphagnum moss horizontally, ensuring the node touches sphagnum moss. We recommend laying it in such a manner that the part with an aerial root (dark or brown growth or spot) faces down and one where the leaf was is facing up. You may notice some leaf scars.
- To ensure the node touches sphagnum moss, you can use small U-shaped hooks or pins at the node.
- Cover the stem nodes with your plastic bag. It will help lock in humidity. Then place them in a warm place with bright indirect light.
- Routinely remove the plastic bag to let the nodes you are propagating breathe. Also, it would be best if you misted sphagnum moss. It shouldn’t dry.
After a few weeks to months, you will begin seeing a new bud emerging and your node rooting. Wait until the bud grows into a shoot with a few leaves and the roots are long enough. You can then transplant it.
Growing Monstera from seeds
The other way to propagate Monstera is using seeds. Mature plants flower and produce fruits with small oblong or spheroidal tan to light green seeds, some slightly larger.
But this method will take slightly longer than other propagation methods.
1. Where to buy the Monstera seeds
Swiss cheese plant or Monstera deliciosa seeds are the most readily available. People from the US, New Zealand, Australia, Canada, the UK, etc., can buy these seeds from Etsy.com from vendors in their respective countries or those who ship. We also saw someone selling them at Amazon.com.
Seeds for other Monstera species, including Monstera adansonii, Peru, obliqua, siltepecana, etc., are not easy to find. Try searching online. You may find a few vendors. Just ensure they are trustworthy.
Lastly, Monstera seed prices will significantly vary but expect to spend from $1 per seed to as high as $5 or more.
2. Warning on Monstera seeds
Please note that you cannot get a variegated Monstera from seeds since the variegations are due to a rare genetic mutation. Would you please ignore those vendors claiming to sell aurea, mint, or Monstera albo seeds? This list includes Monstera borsigiana albo, Thai constellation, and so on.
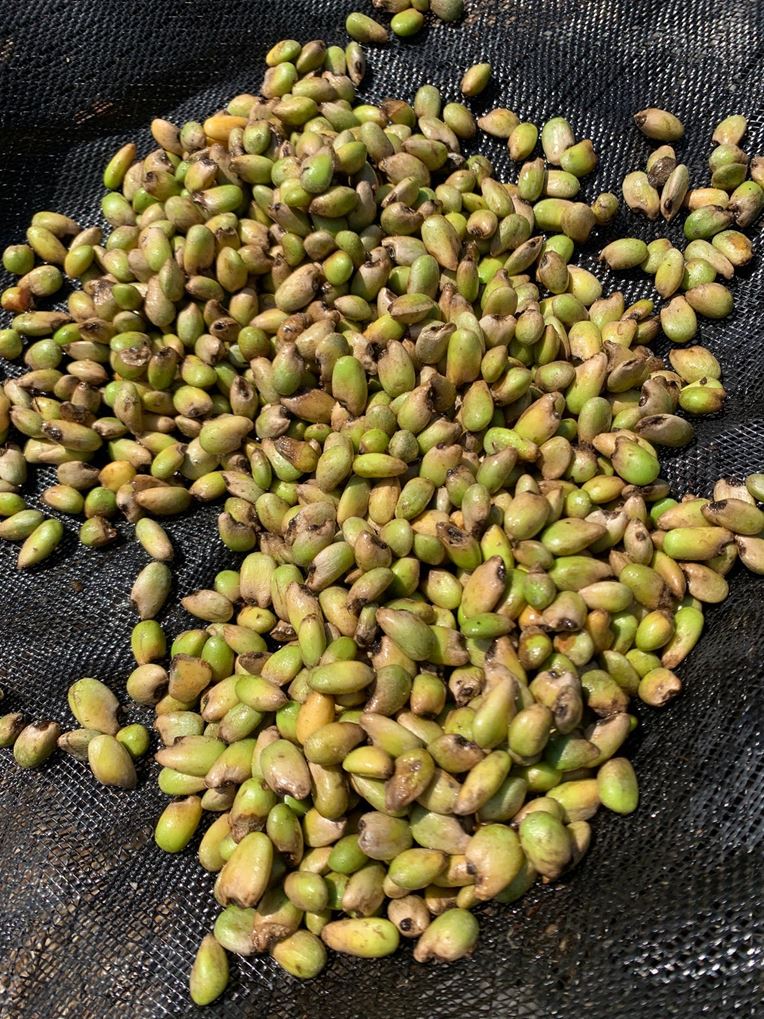
Secondly, Monstera seeds lose viability quickly if allowed to dry. So, please keep them in a cool, moist place.
How to grow Monstera from seeds
Growing Monstera from seeds isn’t difficult if you are lucky to get seeds. Here is how to go about it.
What you need
- Viable seeds
- Germination tray or a shallow container
- Well-drained soil
Steps to follow
- Soak seeds in water for half to a full day. It will speed up germination. But this stem is optional.
- Moisten your potting mix and put it on your germination tray or shallow container.
- If you have a germination tray, poke a shallow hole on the potting mix, about ½ an inch deep, plant your seeds and cover them. But if you have a shallow container, you can scatter the seeds shallowly cover them with soil.
- Cover the germination tray with a plastic bag and place it in a warm place, with optimum being 70 -75°F (21 to 24 °C).
- Mist the soil if it begins to dry.
Your seeds will germinate after 7 to 14 days (one to two weeks). And it will take up to three months for them to be large enough to grow in their pots.
Air layering Monstera propagation
Air layering Monstera propagation is straightforward if you don’t mind seeing wrapped sphagnum moss on nodes. Otherwise, it will guarantee the highest success rate. Why? Because the plant will still be attached to the mother plant.
What you need
- Sphagnum moss
- Plastic bag
- Rooting hormone
- String or twist ties
- Sharp knife
Steps
- Soak your sphagnum moss for about 30 minutes and thoroughly wring it to get rid of excess water. You want it moist, not soggy.
- Select a mature, healthy stem you want to use for propagation and make a small upward cut with your sterilized knife just below the node you will use. The wound you create will make the plant direct more energy to the node, making it root faster.
- Apply your rooting hormone around the node. It will help faster rooting and reduce the chances of stem root.
- Take a ball of sphagnum and wrap it around the node using your plastic bag. You can use soft string or twist ties to secure the plastic bag to the stem but don’t make it too tight.
- Poke small holes on the plastic bag for aeration. They will also help in moistening your sphagnum moss.
- Mist the sphagnum moss when it begins to dry, but don’t make it soggy and continue caring for your Monstera plant as usual.
After a few weeks, the node will have long enough roots and be ready for transplant. Use a sharp scissor to cut it off and plant it into its growing pot.
How to propagated Monstera by division
Monstera plants are not the best houseplants to divide. Why? They hardly grow many suckers. But if yours has one, you can divide it. Otherwise, you better use this method on your peace lily, philodendron, cast iron, snake plant, etc.
The process will involve splitting the mother plant, and you can repot or replant the Monstera plant.
Last but not least, the best time to divide your plant is either spring or early summer. It will give it time to re-establish before the non-growing seasons.
What you need
- Pruning knife
- New pot
- A well-draining, airy potting mix that is high in organic matter
Steps to follow
- Fill your new pot ⅓ way with your potting mix.
- Gently remove the mother plant from its pot, tap its root ball to loosen and remove excess soil.
- Find a well-rooted sucker, cut it from the mother plant with a sterilized knife and slowly detangle its roots.
- Plant your Monstera sucker in the new pot and add more soil to its level with the mother plant.
- Lastly, you can either replant or repot the mother plant.
Transplanting Monstera
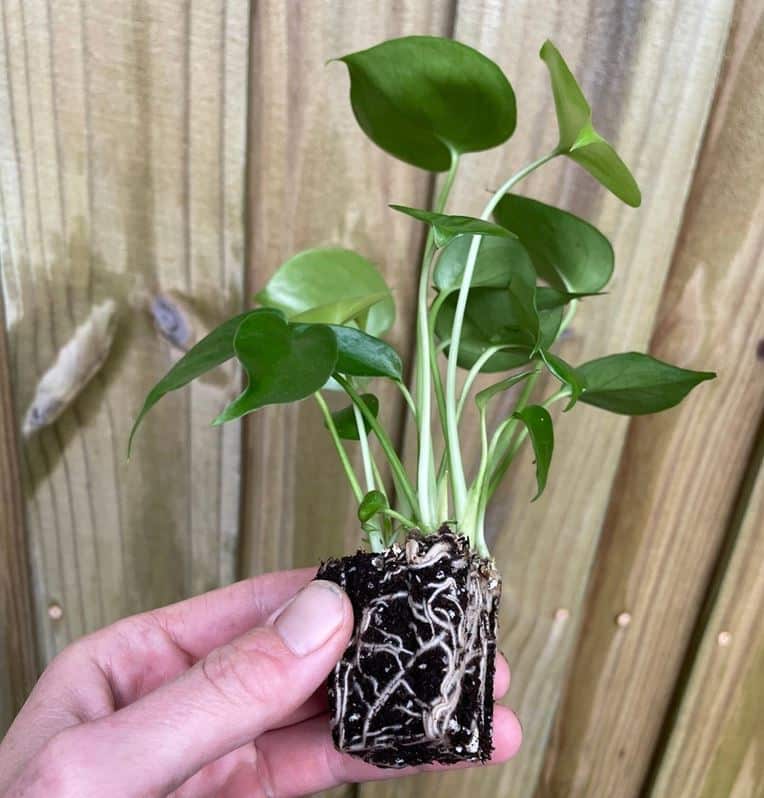
Once the roots are long enough, about 3-4 inches, and you see new growth, you can transplant your Monstera to its growing pots.
Use a well-draining, airy potting mix that is high in organic matter. A mix of 30% potting mix, 30% sphagnum moss, 20% perlite and 20% composite like warm casting is ok. We usually add some bark chips and charcoal and reduce potting mix.
If you want a bushy growth, consider bundling several rooted cuttings, suckers, or seedlings together.
Transplanting is as easy as putting soil ⅓ way in the growing pot, planting the rooted cutting, and adding more soil. Afterward, water it thoroughly.
Transplant shock
Immediately after replanting your rooted cutting or seedling, it may experience some shock. It happens because the roots and plants haven’t acclimated.
Signs you may notice include:
- Your Monstera leaves curling
- Leaf burn – dry brown tips and edges
- Drooping and wilting
- Leaves turning yellow
- Leaves falling
- Death
There isn’t much you can do. Just minimize damage during transplant, bring as much root as possible, and provide the below care tips.
Rooted Monstera care tips
After successful rooting and transplanting your Monstera, you need to care for it until it adjusts. Afterward, you can care for it just as you do to your other Monstera plants.
Here are some essential care tips:
- Keep the soil moist in the first few days to a month (not soggy). Don’t let it dry a bit in-between watering because your plant is still adjusting. Monsteras propagated in water will take longer to acclimate.
- Provide higher humidity, at least 60% or more. You can mist your plant, use a pebble tray, or a humidifier like AquaOasis™ Cool Mist Humidifier (Amazon's best seller). Otherwise, your plant may have some shock.
- Maintain 65 to 85 degrees Fahrenheit (18 to 29°C), and if possible, 70-85°C (24 to 29°C) if you want faster growth. Avoid putting your plant near cold or heat-emitting vents (ACs, radiators, house heating systems, etc.) and sudden temperature changes.
- Provide bright, indirect light. Avoid direct sun as it will cause sunburn or low light. If your apartment doesn’t get enough light, get grow lights. We love Relassy 15000Lux Sunlike Full Spectrum Grow Lamp. It has a long lifespan and has a gooseneck stand you can clamp somewhere.
- Don’t prune your plant yet. But you can remove dead or damaged leaves.
- Don’t fertilize your newly transplanted Monstera. Give it at least 3 to 6 months. It should be fine so long as you use a good potting mix. Also, most potting soils have added fertilizer.
- While not typical, your plant may end up with pests like spider mites, whiteflies, fungus gnats, mealybugs, scale, or thrips. Always check, and if you see any, control them early.
Warning
Monstera is toxic to cats, dogs, other pets, or even humans. Don’t chew it. Also, if you have sensitive skin, use gardening gloves when handling it.


Leave a Reply