It is essential to have a Monstera moss pole, trellis, support, or stake. Why? Because these aroids are climbers in the wild. They will also appreciate having a place to climb at home - a moss pole, wall, indoor tree, trellis, etc.
We’ve reasons why you need to give them a place to climb and how to stake Monstera. We will also teach you how to make a Monstera pole (DIY) and a lot more.
Contents
- Does Monstera need trellis, moss pole, or stake?
- 1. Monstera climbs in nature
- 2. Will grow longer and have larger fenestrated leaves
- 3. Reduce strains stems and roots
- 4. Saves spaces
- 5. Tidy plant with a shape and growth you want
- 6. Extra nourishment and moisture
- Which stake to use? Bamboo, Moss pole, trellis or?
- 1. Coco coir pole and moss pole
- 2. Monstera trellis
- 3. Wooden stake – dowel, cedar, or bamboo pole
- 4. Metal stake or rebar
- 5. Hoops and cages
- When to add Monstera on a moss pole or stake
- How to stake a Monstera
- 1. How to attach Monstera to a moss pole
- a. What you need
- b. Steps to follow
- 2. Mounting to trellis
- How to make a moss pole for Monstera - DIY
- 1. What you need
- 2. Steps to follow
- 3. Alternative ways to make a moss pole
- Repotting Monstera with moss pole
- Caring for Monstera on a moss pole
- Will a Monstera climbing a trellis be very large?
Does Monstera need trellis, moss pole, or stake?
Yes. Monstera needs a stake, but it is not a must. They can still grow just fine without one. Why then a stake?
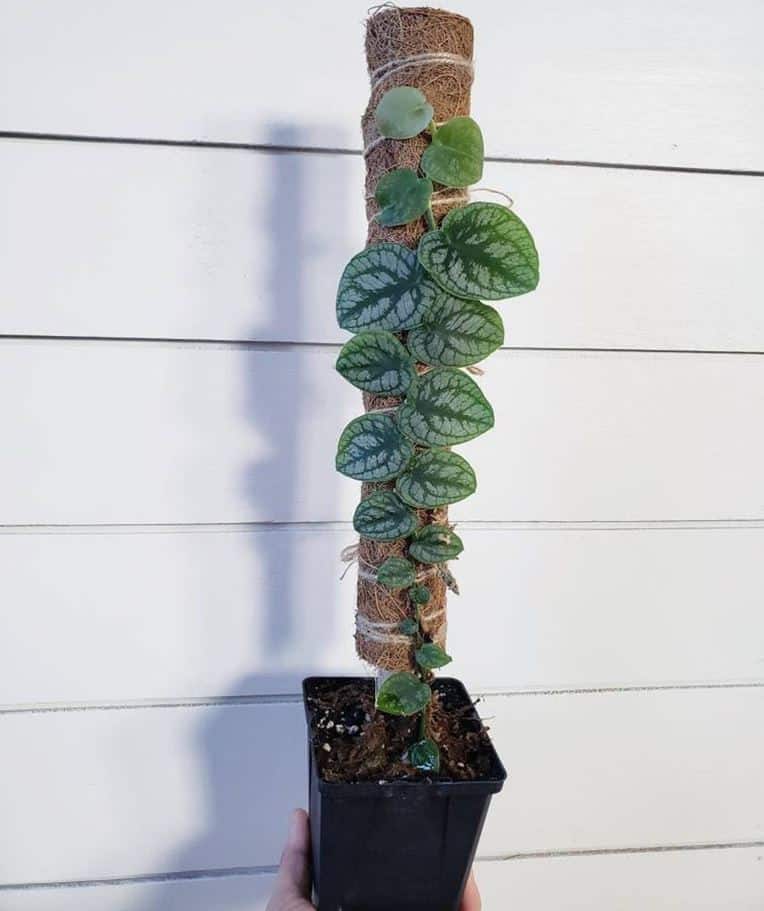
1. Monstera climbs in nature
Monstera is a hemiepiphyte, meaning it grows as a terrestrial plant at one stage and as an epiphyte (on other plants). In the baby or seedling stage, it grows as a ground creeper. It grows as a terrestrial creeper and climber in the juvenile stage, while in the adult stage, it becomes an epiphyte.
Monstera species cannot reach the mature or adult stage without having a place to climb, except for Monstera deliciosa.
Morphologically, Monstera has aerial roots for anchoring to the climbing surface. These roots also help it absorb moisture and water.
It, therefore, goes without saying that giving your Monstera plant a place to climb allows them to grow as they do in nature.
2. Will grow longer and have larger fenestrated leaves
If you want your Monstera to grow larger split or fenestrated leaves, you need to give it a climbing place. Yes, they will still have split or fenestrated leaves without a place to climb and be taller. Also, the leaves may not be as significant.
It will only grow their mature form and flower or bloom in the wild if they get somewhere to climb. A possible explanation for this behavior is that this plant doesn’t focus its energy on supporting itself when supported.
By observing the growth behavior of shingling Monstera species like M. dubia, M. spruceana, and M. acuminata, these plants will become leggy when they reach the top of the climbing surface.
Lastly, some species like Monstera siltepecana will drop stolons or runners without leaves when they reach a climbing end.
3. Reduce strains stems and roots
Monstera doesn’t grow woody stems to keep it upright to reach more light. So, it will start growing to the sides or sprawling as it becomes larger.
As this happens, it may break its stems. Also, it may put a strain on the roots because of the weight the branches grow sideways or cascading exerts.
4. Saves spaces
Some Monstera species like split-leaf philodendron (M. deliciosa) can grow big and sprawl over a wide area and may take up all your space.
Staking such a plant will ensure it remains tall (grow upward) without spreading over a vast area. So, it can fit in the place available.
Last but not least, regularly pruning your Monstera will not give it a chance to be taller if you don’t want it to spread horizontally.
5. Tidy plant with a shape and growth you want
Monsteras can grow haphazardly if not supported, be unruly, and look untidy. But with support, you can influence the growth direction and make your plant look tidier. If you are creative, you can transform your plant into an art piece anyone will enjoy.
6. Extra nourishment and moisture
Using a coco coir or moss pole on Monstera will offer extra nourishment and moisture if you mist these stakes. So, you will have a healthier-looking plant.
Which stake to use? Bamboo, Moss pole, trellis or?
To support your plant, you can use ready-made bamboo or cedar poles, moss or coco coir poles, trellis, totem, dowel, viny coated metal rod, cage, and so on or make one. You can even let your plant climb on the wall, indoor tree, or any surface.
Let us look at the staking options, giving you their pros and cons.
1. Coco coir pole and moss pole
The most common option of staking Monstera and many other climbing plants is a moss or coco coir pole. These two have a pole (metallic, plastic, or wood) wrapped around with either coco coir or sphagnum moss.
Coco or moss poles come in different lengths, with some stackable, i.e., you can add one on top of the other.
If you moist them, they create a texture that mimics the mossy back of tree trunks in the American tropical rainforest natural habitat for Monstera.
Pros
- Moss poles allow roots to anchor to the sphagnum moss. So, you can remove mounting ties.
- If misted, they can provide additional nutrients and moisture to your plant.
- Fairly affordable
- Some are stackable to make them long
Cons
- They are not strong enough to hold large Monstera species like deliciosa.
- Coco coir and moss pole are prone to molds or bacteria if you mist them often and poor air circulation.
- Some people don’t find them aesthetically pleasing.
- Once the roots grow into the moss pole, removing them is hard to remove the plant from the moss pole without damaging it or its roots. If repotting your Monstera, you must do it with it.
Best buys
If you are looking for a Monstera moss pole, check Amazon.com or Etsy.com. You will get many on offer, including stackable.
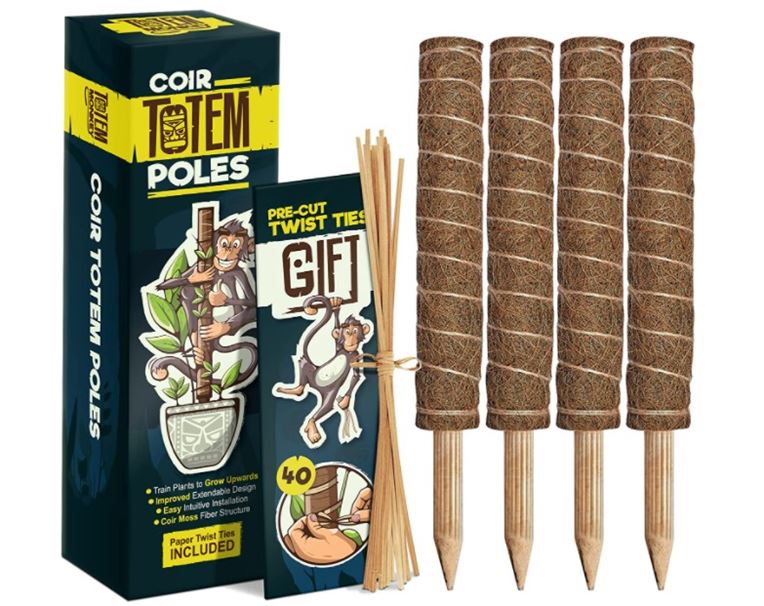
One such excellent brand is Totem Monkey Moss Pole for Plants, a coco coir pole sold in 4 stackable pieces. Combines, you will get a total of about 4 feet in height.
2. Monstera trellis
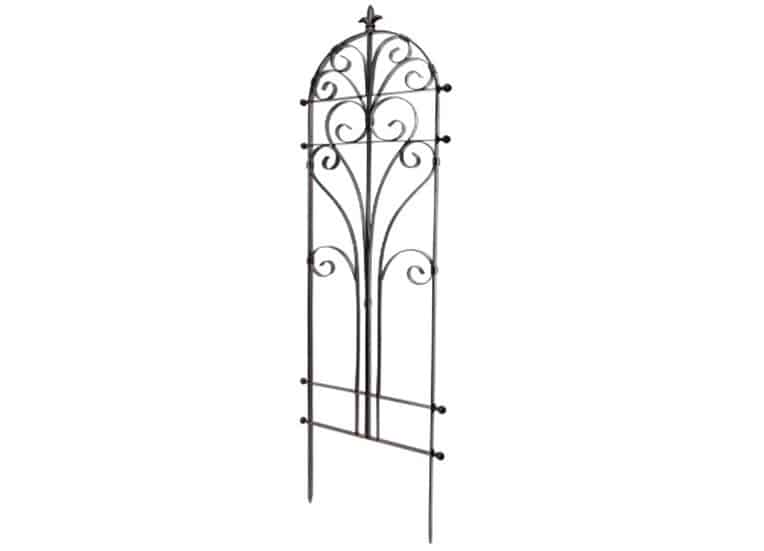
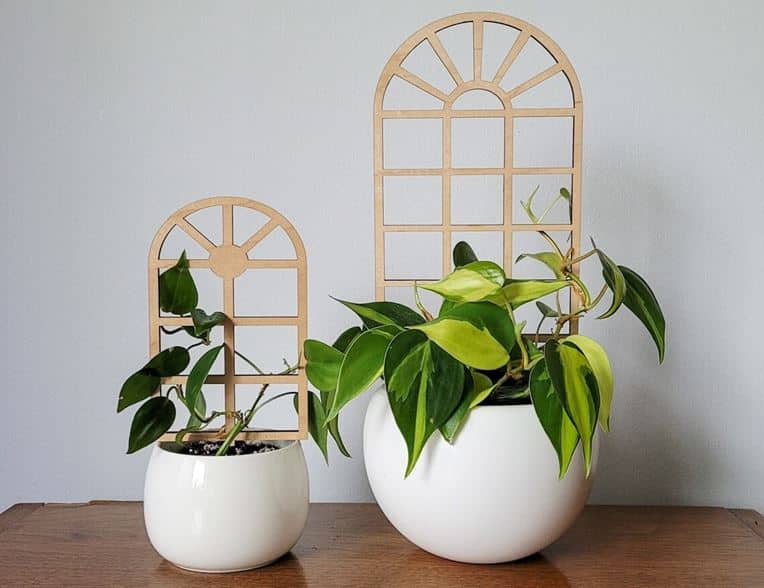
Trellis is a framework structure for staking indoor and outdoor plants. It may be made from metal (iron or steel), wood, vinyl, or other materials and come in various sizes, shapes and designs.
You can go for a wall-mounted, arched, lattice, obelisk, gothic, expanding, fan, or folding trellis.
Pros
- A trellis will improve air circulation, thus reducing fungal and bacterial monstera leaf spots, rusts, and blights.
- They will allow your plant to get more light. Your plant will grow evenly and be healthy.
- Aesthetically appealing
- Flexible. You can install trellis anywhere, including on walls.
- Come in various designs. You need to pick one that fits the space you have.
- Offer many points to attach to your plant if it’s bushy. So, you can guide it in the shape you want with several ties.
Cons
- They cost more
- Require assembling
Best buy
It’s not a secret that trellis is our favorite choice for Monsteras and other vining plants like pothos, philodendrons, and so on.
Designs are unlimited, including those that look like a pergola, arbor, and so on. See Etsy.com and Amazon for ideas.
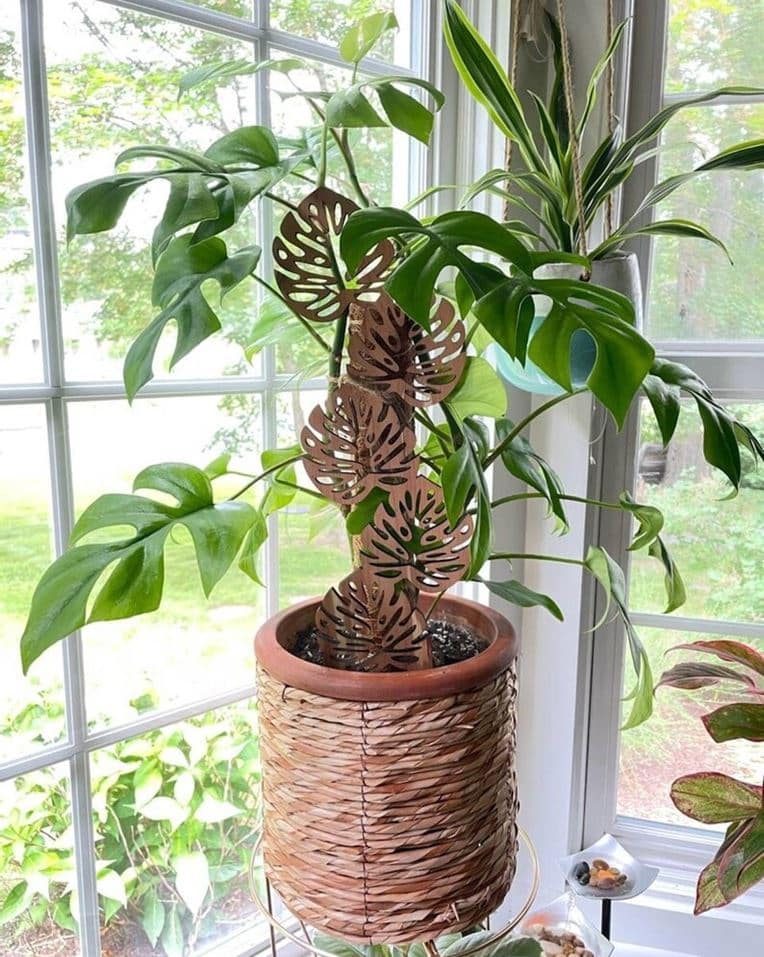
3. Wooden stake – dowel, cedar, or bamboo pole
Wood stake like a dowel, cedar, bamboo pole, etc., are another common choice of support for Monstera. Always go for raw, unfinished, or untreated wood to avoid exposing your Monstera to some chemicals they may have. If you prefer those colored green, ensure the paints used are safe.
Pros
- They look natural and unobtrusive
- Eco-friendly
- Light in weight
- They are affordable and readily available. You can even make your own at home.
- Stronger than moss or coco coir, making them ideal for larger plants.
Cons
- They may grow molds, moss, or rot with time, meaning you may have to replace them after some time.
- They may crack or break
- These wooden stakes may warp
- Vulnerable to pest damage
Best buy
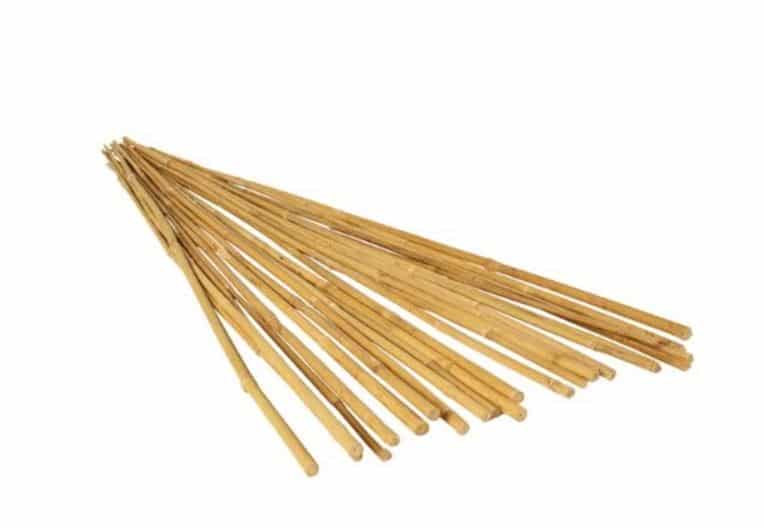
Hydrofarm bamboo stakes are the most popular choice to buy. They come in four sizes, i.e., 2, 3, 4, and 6 feet. These stakes are durable, strong, and suit indoor or outdoor use. Also, they are lightweight and have a lovely smooth finish.
4. Metal stake or rebar
Metal stake or rebar is another excellent choice that works like cedar or bamboo poles. Most are steel and may be galvanized, serrated, or coated with knobby plastic.
Pros
- They are durable, i.e., they can last for many years.
- Metal stakes are more robust, making them ideal even for large Monstera.
- Resistant to any pests such as termites
Cons
- They are expensive
- These stakes will rust if the coating wears
- Not stackable like some moss pole
Best buy
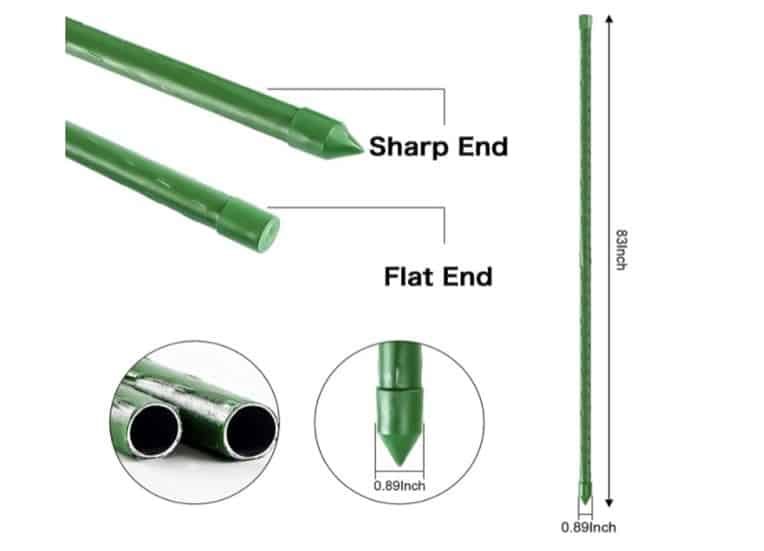
When buying, go for non-toxic and coated with plastic or vinyl as they will not rust. Also, let these stakes have a knobby surface to hold ties in place. Our favorite pick is FEED GARDEN Stakes.
FEED GARDEN Stakes are plastic-coated and have a diameter of 0.89 inches thick. These stakes come in 6 sizes (30-inch, 36-inch, 48-inch, 60-inch, 72-inch, and 83-inch). They are robust, durable, and are green-colored, making them less noticeable.
5. Hoops and cages
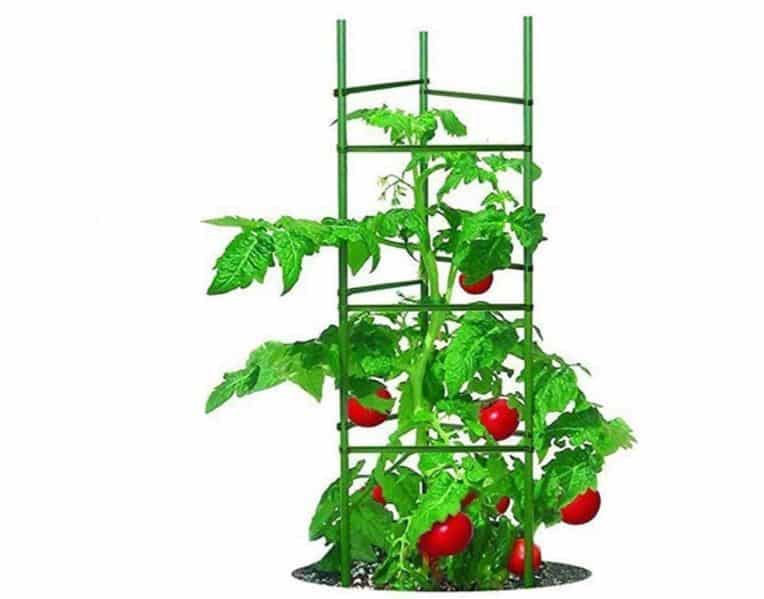
The use of place cages is another way to support your Monstera and other vining or climbing plants. They are more or less what you use tomatoes to surround your plant.
These cages maybe wood or metallic and surround your plant. They come in various shapes (circular, triangular, or square), and if you are creative, you can make your own at home.
Pros
- They are easier to use. You don’t need staking into the potting mix as it damages plants.
- Excellent quality cages can support even a considerable plant
- They will allow you to have a bushier plant since you have many points to attack your plant branches.
Cons
- Some people find them less appealing and bulky
- High-quality metallic hoops and cages are expensive.
- They may fall over
Best buy
Plant cages work best for busy or plants with several steps. If you want to prevent your Monstera from sprawling all over, the 5 feet tall Growsun Large Tomato Cage will do the job. It is plastic coated, easy to install, and is sturdy.
When to add Monstera on a moss pole or stake
The best time to mount Monstera on stake is when the plant is still young and searching for a place to climb or support. Some telltale signs that your Monstera needs support are if you see it growing sideways or downwards to the cabinet, table, or countertop. When this happens, you will see stems arching side or downward.
If possible, install your moss pole as you are repotting your Monstera for the first time if you bought. This way, you will minimize root damage associated with installing your moss pole later, unless you are not mounting it inside the potting mix.
Lastly, you can still stake your older, unruly plant. But you need to be gentle and don’t force stems towards your pole at once. It may snap. Instead, slowly be pulling it closer to the stake once a week. Over time, it will be closer to the pole and start sending aerial roots to your moss pole and attaches.
How to stake a Monstera
Staking Monstera isn’t an arduous task. The exact steps will depend on using a moss pole, trellis, or cage. But most of the steps are somewhat the same. The only difference will be installing the stake itself.
1. How to attach Monstera to a moss pole
Since they are the most popular staking choice by many people, we will take you through how to attach you how to attach Monstera to the moss pole. It isn’t a difficult task.
a. What you need
- Stake
- Gloves
- Gardening trowel
- Garden ties, twist ties, gardening Velcro, twist ties, tape, fabric strips, soft twines, etc.
- If you are reppoting, you will need a new larger pot for your Monstera, about 2-3 inches wider in diameter, and an appropriate Monstera potting mix or soil.
b. Steps to follow
Step 1: Install your stake
If you are repotting your Monstera, you need to fill the soil ⅓ way and install the pole on the center. Afterward, transplant your Monstera and add more soil.
On the other hand, if you are mounting, gently dig some soil from the point you intend to climb your pole until you see the roots. Then, gently insert your stake and drive it as deep as possible. Don’t just push it into the potting mix.
Once installed, lightly tap the soil around the pole to ensure it remains upright and supports your plant. We recommend placing it at the center as it will be stable and prevent toppling.
Step 2: Mounting or training your Monstera
Use twist ties, Velcro, string, tape, fabric, or whatever you prefer to tie the stems to the pole. We prefer using gardening Velcro because they are easier to mount.
If your plant has many branches, you may need several poles or a trellis. Also, you can prune any that seems too off from stake.
Last but not least, as you train your Monstera, don’t tie the stems or offshoots too tightly as it may damage them or restrict growth. Alternatively, use stretchy plant tape.
Step 3: Mist your Monstera moss pole
If you are using a store-bought dry moss pole, once you mount it, you can mist it. It will encourage the plant to attach faster.
2. Mounting to trellis
If you opt for a Monstera trellis, the process is more or less the same. The only difference will be mounting your framework. How to go about it depend on what the manufacturer hand in mind. Once in place, you can start tying the branches or stems to the trellis.
How to make a moss pole for Monstera - DIY
Did you know that you can make a moss pole at home for your Monstera? The whole idea may seem intimidating, but trust me, it is straightforward.
1. What you need
- Get a pole or dowel - PVC, wood (like bamboo or cedar), metal, or plastic. The thickness and length will depend on the size of your plant. Use a thicker one for larger plants and thinner for smaller ones. Let it be at least 1-2 feet taller than your plant. Include pot height in your measurement.
- Sphagnum moss
- Fishline twines
- Scissor
- A large tray filled with water for soaking your sphagnum moss
- Marker pen
- Rubber gloves
2. Steps to follow
- Wear your rubber gloves.
- Soak your sphagnum moss in water for 20-30 minutes. Next, remove it and thoroughly wring to get excess water. It should not drip water when you squeeze it hard.
- Mark where you want the sphagnum moss to reach on your pole. It should be close to the soil line but shouldn’t touch the soil to avoid decay and water wicking.
- Tightly tie your twine or string on the upper end of the pole, making a strong knot that will not come off quickly.
- Take a handful of sphagnum moss, flatten and lay it on the pole while holding it with one hand. Use the other hand to secure the most to the pole using your twine in a downward diagonal. The sphagnum moss should be 0.5 to 1 inch after tying it.
- Keep adding more moss and tying until you reach the marked point. Then, make a tight knot and cut the remaining twine.
- Trim any stray pieces with your scissor. Your moss pole is ready for attaching.
3. Alternative ways to make a moss pole
- Gardening mesh: Some people use gardening mesh and twist ties. It is a much easier way. Determine how thick your pole should be and snip the mesh. Lay your sphagnum moss on the mesh, place the stick at the center, wrap the mesh and secure it with twist ties.
- Using moss or coconut fiber sheet: It will be easier to mount if you can get moss sheet or coconut fiber sheet. You only need to wrap it around the pole and secure it with your twine.
- With jute: You don’t need sphagnum moss if you get thick jute, about ½ to 1 inch. Just wrap it around your pole and bind it with the help of strong glue.
- Mesh wire tube: Make a mesh wire tube about the diameter of the moss pole you need, fill it with sphagnum moss and insert your stake at the center.
Repotting Monstera with moss pole
If roots don’t grow into the stake, you can easily remove the stake before repotting your plant. Just undo the ties or whatever you used to secure your plant. Then remove the support and continue to repot as usual.
On the other hand, it will grow roots into the moss pole. You will either have to remove the plant or repot with the stake.
You must either sacrifice your moss pole or cut aerial roots to remove the plant. But you can avoid both these two scenarios by repotting with the moss pole. It is not complicated.
All you need to do is ensure you gently slide the plant and pole while holding them together. And once you loosen the root ball, fill the new pot ⅓ way up with your fresh potting mix and move the plant and pole into it. For huge plants, enlist a helping hand.
Caring for Monstera on a moss pole
After successfully training your Monstera, you need to keep misting the pole to encourage root growth. It will also help nourish the plant.
For balanced growth, you need to rotate your plant after every few months to ensure all sides have a chance to face the sun.
Lastly, care for the plant is usual, i.e., ensure the following:
- Ensure it has bright, indirect light, a humidity of at least 50% or more, and keeps the optimum temperature range of 65-85°F.
- Water your Monstera when the top 2-3 inches of the soil feel dry
- Fertilizer your plant with an all-purpose, balanced liquid houseplant fertilizer once a month in spring and summer. See the best fertilizer for Monstera plants.
- Prune and groom your plant, i.e., clean your Monstera leaves when they are dusty.
- Repot this plant after every 1-2 years or when rootbound.
- Always inspect your plant for any sign of disease or pests like thrips, scale, spider mites, whiteflies, mealybugs, etc.
Will a Monstera climbing a trellis be very large?
Staking will indeed make your plant grow more significant. But if you routinely prune it, you can still keep the size you want. Remember Monstera’s growth rate is moderate. So, it will take a long for the plant to grow very large.


Leave a Reply